
Quick Outline
- Why more athletes are building home ice bath systems
- The core components of an effective ice bath setup
- Choosing the right tub and chiller
- Ideal temperature and session guidelines
- Step-by-step home installation process
- Common mistakes athletes make
- Maintenance and long-term operating costs
- Building a recovery routine around cold therapy
- FAQs
- CHILLMEND CTA
Ice Bath Setup for Athletes: Home Recovery System Guide
Athletes are always searching for an edge.
Sometimes that edge comes from better training. Sometimes it comes from nutrition. And sometimes it comes from something much simpler—recovering faster than everyone else.
That’s one reason ice baths have moved far beyond professional locker rooms. What was once reserved for elite sports teams is now showing up in garages, home gyms, backyards, recovery rooms, and even apartment balconies.
The interesting part? The biggest challenge isn’t taking an ice bath. It’s building a setup that actually works day after day.
A poorly planned system can become frustrating very quickly. Water gets dirty. Temperatures fluctuate. Buying bags of ice becomes expensive. And before long, the recovery tool you were excited about turns into another household chore.
This guide walks through everything athletes need to know about creating a reliable home ice bath recovery system—from selecting equipment to maintaining consistent cold temperatures all year long.
Why More Athletes Are Building Home Ice Bath Systems
Recovery has become part of modern athletic training.
Whether you’re a runner preparing for a marathon, a CrossFit competitor, a cyclist logging long miles, or simply someone training hard several times a week, recovery affects performance just as much as training volume.
When muscles experience intense exercise, tiny amounts of tissue damage and inflammation occur. This is a normal part of adaptation. However, managing that recovery process can help athletes maintain consistency.
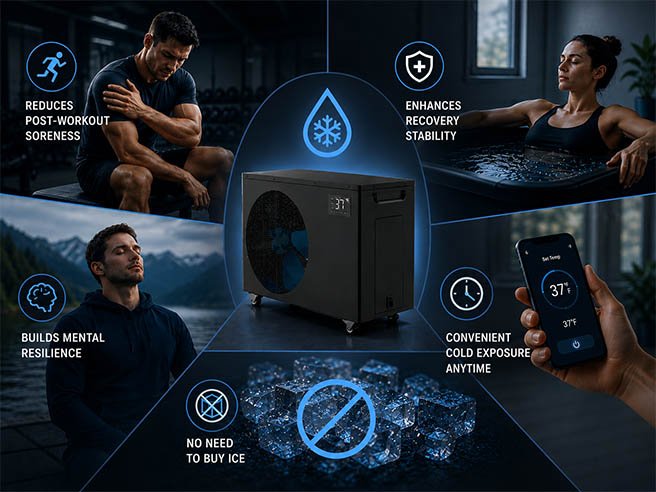
Cold water immersion has become popular because it offers several practical benefits:
- Reduced post-workout discomfort
- Improved recovery consistency
- Better mental resilience
- Convenient access to cold exposure
- Reduced reliance on purchasing ice
Here’s the thing.
Many athletes start with a bathtub and a few bags of ice. It works at first. Then reality sets in.
Buying ice every week becomes expensive.
Preparing each session takes time.
Water temperatures vary constantly.
That’s usually when athletes begin looking at dedicated home recovery systems.
A properly designed ice bath setup removes those headaches and makes recovery accessible whenever it’s needed.
What Makes Up a Complete Ice Bath Recovery System?
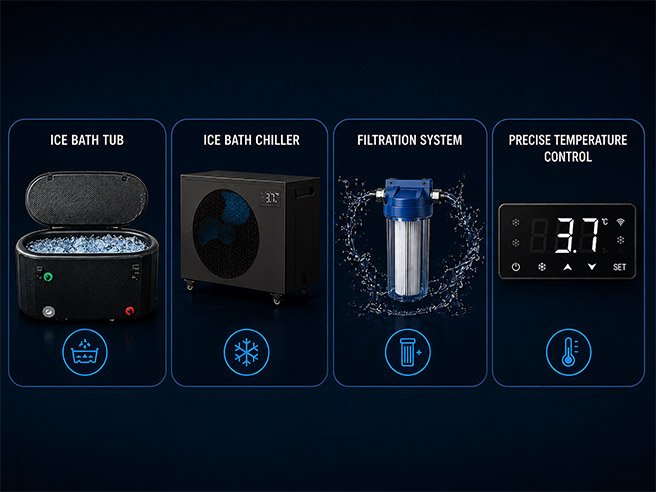
An effective ice bath system is surprisingly straightforward.
Most setups include four essential components.
1. The Ice Bath Tub
The tub serves as the foundation of the entire system.
Athletes generally choose between:
- Inflatable tubs
- Portable folding tubs
- Insulated cold plunge tubs
- Stainless steel plunge tubs
- Cedar cold plunge barrels
Portable tubs are affordable and easy to move.
Premium insulated tubs cost more but help maintain water temperature for longer periods while reducing energy consumption.
For athletes training year-round, insulation often becomes more valuable than expected.
Think of it like owning a quality cooler versus a thin plastic container. Both hold water, but one performs much better over time.
2. The Ice Bath Chiller
This is where most modern systems differ from traditional ice baths.
Instead of continuously adding ice, a chiller cools and maintains water automatically.
A dedicated ice bath chiller typically includes:
- Cooling system
- Water pump
- Filtration
- Temperature controller
- Circulation system
For serious athletes, a chiller often becomes the most important component of the setup.
It provides consistency.
Consistency is what turns recovery from an occasional activity into a repeatable training tool.
3. Filtration and Water Treatment
Many new users underestimate this part.
The water may look clean on day one.
After several weeks of use, things change.
Sweat, skin particles, body oils, and environmental contaminants gradually accumulate.
A proper filtration system helps maintain water quality and reduces maintenance requirements.
Many advanced systems include:
- 20-micron filters
- Hair filtration
- UV sterilization
- Continuous circulation
These features are particularly valuable for households where multiple athletes share the same recovery tub.
4. Temperature Monitoring and Controls
Modern recovery systems allow precise temperature management.
Rather than guessing water temperature, athletes can maintain exact settings.
Common target temperatures range from:
- 3°C–5°C (37°F–41°F) for experienced users
- 6°C–10°C (43°F–50°F) for most athletes
- 10°C–15°C (50°F–59°F) for beginners
The ability to maintain consistent temperatures creates a much more predictable recovery experience.
Choosing the Right Ice Bath Tub for Your Training Goals
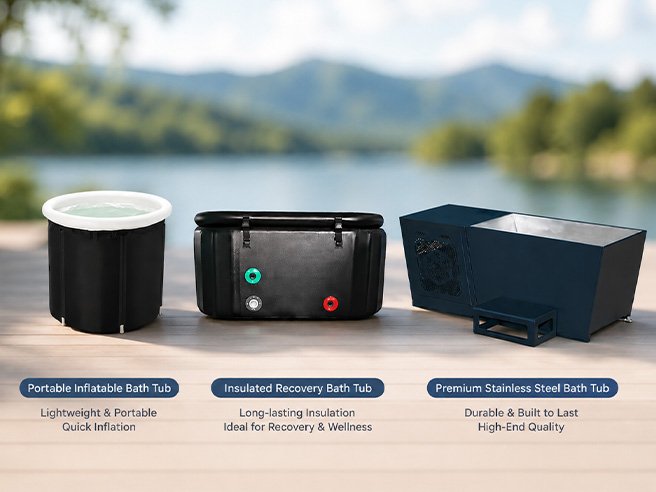
Not every athlete needs the same setup.
A recreational runner and a professional sports organization have very different requirements.
Let’s break it down.
Portable Inflatable Tubs
These are ideal for:
- Beginners
- Apartment users
- Budget-conscious athletes
- Temporary installations
Advantages:
- Low cost
- Easy storage
- Quick setup
Limitations:
- Lower insulation
- Shorter lifespan
- Less premium experience
Insulated Recovery Tubs
These work well for:
- Frequent users
- Dedicated home gyms
- Year-round recovery
Advantages:
- Better temperature retention
- Reduced energy use
- Greater durability
For athletes planning multiple sessions per week, insulation often pays for itself over time.
Premium Stainless Steel Tubs
These are commonly selected by:
- Professional athletes
- Recovery studios
- Wellness facilities
- Luxury home gyms
Advantages include:
- Exceptional durability
- Premium appearance
- Long service life
The upfront investment is higher, but many users appreciate the combination of performance and aesthetics.
How to Choose the Right Ice Bath Chiller
This is usually the biggest purchasing decision.
The wrong chiller can leave athletes waiting hours for water to cool.
The right one creates a seamless recovery experience.
Consider Water Volume
A small tub and a large plunge pool require different cooling capacities.
Typical recommendations include:
| Water Volume | Suggested Chiller Range |
|---|---|
| 100–200L | 1/3 HP |
| 150–300L | 1/2 HP |
| 200–500L | 1 HP |
| 400L+ | 1.5 HP to 2 HP |
Larger systems generally cool faster and maintain temperatures more effectively in hot climates.
Think About Your Environment
Climate matters more than many people realize.
An athlete living in Arizona faces different cooling challenges than someone in Canada.
Outdoor installations exposed to summer heat place greater demands on the cooling system.
When ambient temperatures rise, additional horsepower can significantly improve performance.
Look Beyond Cooling
Many athletes focus only on cooling speed.
That’s understandable—but incomplete.
A quality chiller should also provide:
- Reliable circulation
- Effective filtration
- Water sanitation
- Stable temperature control
- Low operating noise
A fast-cooling unit loses value quickly if maintenance becomes difficult.
What Is the Best Ice Bath Temperature for Athletes?
This question comes up constantly.
The answer depends on experience and goals.
Beginners
Recommended range:
10°C–15°C (50°F–59°F)
This temperature allows newcomers to adapt safely while still experiencing meaningful cold exposure.
Many people are surprised by how cold 10°C actually feels.
Intermediate Athletes
Recommended range:
6°C–10°C (43°F–50°F)
This is where most consistent users spend their time.
It balances comfort, recovery, and practicality.
Advanced Cold Exposure Users
Recommended range:
3°C–6°C (37°F–43°F)
These temperatures create a significantly more intense experience.
Athletes should gradually work toward this range rather than jumping directly into it.
Step-by-Step Home Ice Bath Installation Guide
Setting up a home recovery system isn’t complicated.
Still, a little planning prevents future headaches.
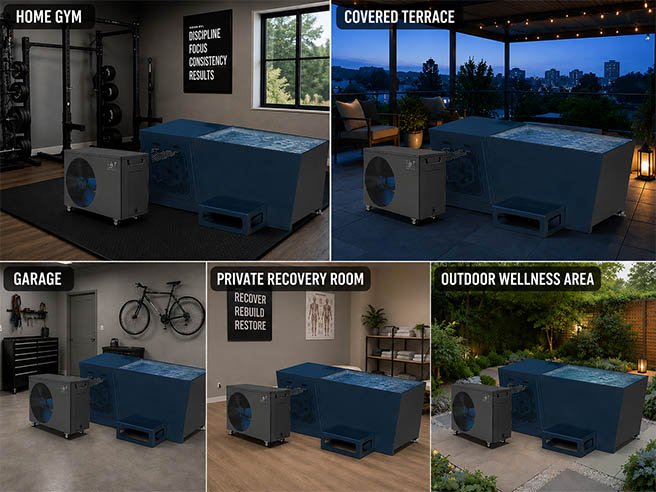
Step 1: Select the Location
Good locations include:
- Home gyms
- Covered patios
- Garages
- Recovery rooms
- Outdoor wellness spaces
Look for:
- Stable flooring
- Nearby electrical access
- Convenient drainage
- Adequate ventilation
If you’re placing the system outdoors, weather protection can extend equipment lifespan.
Step 2: Position the Tub
Place the tub on a level surface.
Uneven surfaces create stress points and may affect water circulation.
Rubber mats are often a smart addition because they:
- Improve safety
- Protect flooring
- Reduce slipping
Sometimes the simplest upgrades provide the biggest improvements.
Step 3: Connect the Chiller
Most modern chillers use quick-connect fittings.
Installation typically involves:
- Connecting the inlet hose
- Connecting outlet hose
- Checking seals
- Confirming water flow direction
Always follow manufacturer specifications.
A properly connected system minimizes leaks and improves efficiency.
Step 4: Fill the Tub
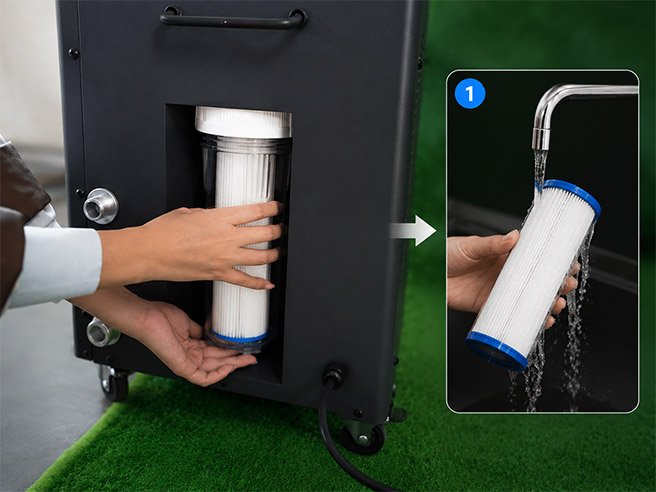
Fill with clean water before activating the system.
Running the circulation equipment without adequate water can damage components.
Take a few extra minutes here. It matters.
Step 5: Start Cooling
Set your target temperature.
Most athletes initially choose:
- 8°C
- 10°C
- 12°C
These settings provide a comfortable starting point.
Allow the system sufficient time to reach temperature before the first session.
Common Ice Bath Setup Mistakes Athletes Make
Even experienced athletes occasionally overlook the basics.
Here are the most common issues.
Buying Too Small a Chiller
This happens frequently.
People focus on purchase price and underestimate cooling requirements.
The result?
Slow cooling and inconsistent temperatures.
A slightly larger system often delivers a much better user experience.
Ignoring Water Filtration
Dirty water becomes a maintenance nightmare.
Filtration isn’t glamorous, but it’s essential.
Athletes who prioritize sanitation typically spend less time cleaning and more time recovering.
Choosing Convenience Over Insulation
An inexpensive tub can seem attractive.
Then summer arrives.
Cooling costs rise.
Water temperatures fluctuate.
Suddenly, the cheaper option isn’t quite so cheap.
Changing Water Too Frequently
Some users replace water far more often than necessary.
With proper filtration and sanitation, water can remain usable for extended periods.
This reduces both maintenance and operating costs.
Ice Bath Maintenance: Keeping Your System Running Smoothly
A well-maintained recovery system can provide years of reliable performance.
Fortunately, maintenance is relatively simple.
Weekly Tasks
- Check water clarity
- Inspect fittings
- Verify circulation
- Remove debris
These checks typically require only a few minutes.
Monthly Tasks
- Clean filters
- Inspect hoses
- Check electrical connections
- Review temperature performance
Small maintenance routines often prevent larger issues later.
Seasonal Tasks
For outdoor installations:
- Inspect insulation
- Check weather protection
- Clean cooling components
- Verify drainage systems
Seasonal maintenance is particularly important for athletes using systems year-round.
Understanding Ice Bath Operating Costs
One concern many athletes have is electricity usage.
The reality is often better than expected.
Operating costs depend on:
- Chiller size
- Ambient temperature
- Insulation quality
- Usage frequency
- Local electricity rates
Well-insulated systems generally consume less energy because they require fewer cooling cycles.
It’s similar to a high-efficiency refrigerator.
The initial investment may be higher, but operating costs are usually lower over time.
For athletes who previously purchased ice several times per week, a chiller system can often become the more economical solution.
Creating a Complete Recovery Routine Around Your Ice Bath
An ice bath shouldn’t exist in isolation.
The best results come from integrating recovery into a broader performance strategy.
Many athletes combine cold immersion with:
- Sleep optimization
- Mobility work
- Stretching
- Nutrition planning
- Hydration
- Active recovery sessions
Recovery works like a team sport.
Each component contributes something valuable.
An ice bath is one player on that team—not the entire roster.
Still, it can be a very important player.
Especially when training volume increases.
Especially when competitions approach.
Especially when consistency matters most.
Why Dedicated Home Recovery Systems Are Becoming the New Standard
Athletes today have access to tools that previous generations rarely considered.
Home recovery systems are one example.
What began as buckets of ice and improvised tubs has evolved into sophisticated cooling systems capable of maintaining precise temperatures, circulating clean water, and supporting year-round use.
The biggest advantage isn’t convenience alone.
It’s consistency.
When recovery becomes easy, athletes use it more often.
When they use it more often, it becomes part of their routine.
And routine is where long-term results usually happen.
Not through occasional heroic efforts.
Through consistent habits repeated week after week.
FAQs
1. What is the best home ice bath setup for athletes?
The best home ice bath setup for athletes typically includes an insulated tub, an ice bath chiller with filtration, water sanitation features, and precise temperature controls. This combination provides consistent cold temperatures while minimizing maintenance and ice costs.
2. How cold should an athlete’s ice bath be?
Most athletes use water temperatures between 6°C and 10°C (43°F–50°F). Beginners often start closer to 10°C–15°C, while experienced cold exposure users may prefer temperatures below 6°C.
3. Do I need an ice bath chiller for a home recovery system?
While bags of ice can work temporarily, a dedicated ice bath chiller offers automatic temperature control, reduced operating effort, cleaner water, and a more convenient long-term recovery solution.
4. How often should I change the water in my ice bath?
With proper filtration, UV sterilization, and routine maintenance, athletes can significantly extend the life. Exact schedules depend on usage frequency, sanitation practices, and the number of users.
5. What size ice bath chiller should I choose for my cold plunge tub?
The ideal ice bath chiller size depends on water volume, climate, and usage frequency. Smaller tubs may perform well with 1/3 HP systems, while larger commercial-style tubs often benefit from 1 HP or higher cooling capacity.
Build a Professional Home Recovery System with CHILLMEND
If you’re ready to move beyond bags of ice and create a reliable athlete-focused recovery setup, CHILLMEND can help. As a professional ice bath chiller manufacturer specializing in OEM and ODM cold plunge solutions, CHILLMEND offers high-performance cooling systems designed for home athletes, gyms, wellness facilities, sports teams, and recovery centers. From compact residential units to powerful commercial-grade chillers, our team can help you select the right system based on your tub size, climate, and recovery goals. Contact CHILLMEND today to discuss your project and receive expert guidance on building the ideal home ice bath recovery system.